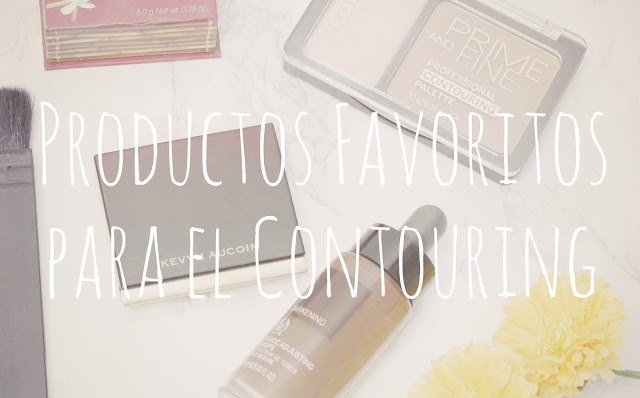
Understanding Contouring Makeup
Contouring makeup is a popular technique used to enhance and define the natural structure of the face. By skillfully applying darker shades to certain areas and highlighting others, it creates the illusion of more sculpted and dimensional features. Understanding the fundamentals of contouring allows makeup enthusiasts to achieve a polished, age-defying look that accentuates their best facial features with subtlety and precision.
Definition and Purpose
Contouring makeup is a cosmetic technique used to define and enhance the natural structure of the face by creating shadows and highlights. It involves applying darker shades to areas that you want to recede or appear slimmer and lighter shades on areas you want to bring forward or emphasize. The main goal is to sculpt the face, improve facial proportions, and create a more dimensional look.
- Define facial features such as cheekbones, jawline, and nose
- Create an illusion of depth and dimension on a flat surface
- Enhance natural bone structure and facial contours
- Conceal or diminish the appearance of certain facial features
- Achieve a polished, glowing complexion suitable for different occasions
History and Evolution
Contouring makeup is a technique used to define and enhance the natural structure of the face by strategically applying darker shades to create shadows and lighter shades to highlight certain areas. This method emphasizes facial features such as cheekbones, jawlines, and noses, providing a sculpted and more contoured appearance. The practice of contouring has gained widespread popularity through beauty influencers and social media platforms, making it a staple in modern makeup routines.
Historically, the concept of contouring dates back to theatrical and stage makeup, where artists used exaggerated shading to make facial features more pronounced under stage lighting. In the early 2000s, contouring began to evolve within the beauty industry, taking cues from celebrity makeup artists who showcased subtle, contouring techniques to enhance natural beauty. The evolution of contouring has been driven by advances in cosmetic products, including the development of powders, creams, and sticks designed specifically for contouring purposes.
Over time, contouring makeup has become more refined and accessible, with tutorials and tips available to help beginners achieve professional-looking results. The trend has also adapted to diverse face shapes and skin tones, promoting inclusive beauty standards. Today, contouring continues to evolve with innovations such as cream-to-powder formulas and digital shading guides, reflecting its enduring significance in the ever-changing landscape of beauty and self-expression.
Tools and Products for Contouring
Contouring makeup tools and products are essential for creating skillful, dimensional looks that enhance facial features. From cream and powder contours to brushes and sponges, each item plays a vital role in achieving a natural or dramatic effect. Choosing the right tools and products allows for precise application and seamless blending, ensuring a flawless finish that highlights your best features.
Contouring Brushes and Sponges
Contouring makeup involves defining and enhancing the natural structure of the face to create a sculpted look. To achieve flawless results, the right tools and products are essential. Contouring brushes are specially designed with angled or tapered bristles to apply and blend contour powders or creams seamlessly. Sponges, on the other hand, offer versatility and ease of use for blending product into the skin, resulting in a natural finish. Each tool’s design helps in precise application, avoiding harsh lines and creating dimension. Popular contouring products include matte powders, creams, or sticks in shades slightly darker than your natural skin tone, complemented by highlighters to accentuate high points of the face.
Types of Contouring Products (Cream, Powder, Stick)
Contouring makeup is a popular technique used to define and enhance the natural structure of the face. To achieve the desired look, various tools and products are utilized, each offering different finishes and application ease. Contouring products come in several types, including cream, powder, and stick options, allowing for customization based on skin type and desired effect.
Cream contour products are highly blendable and ideal for creating a natural, seamless finish. They work well on all skin types, especially for those with dry skin, as they add hydration while allowing for easy blending with brushes or fingers.
Powder contour products are perfect for those with oily or combination skin. They offer a matte finish and are great for setting cream contours or for lighter, more buildable contouring. They can be applied with brushes to achieve precise shading and definition.
Stick contours provide a convenient, portable option that combines cream and solid textures. They allow for quick application and blending, making them suitable for on-the-go touch-ups. Their creamy consistency helps in creating well-defined shadows and highlights for a sculpted look.
Highlighting vs. Contouring Shades
Contouring makeup involves sculpting the face to enhance its natural features, and it relies on a variety of tools and products to achieve the desired effect. Proper tools such as contour brushes, blending sponges, and highlighting brushes help ensure precise application and seamless blending. Contouring products typically include powders, creams, or sticks in shades that are darker than your skin tone to create shadows, while highlighting shades are lighter tones used to bring forward certain areas of the face. Choosing the right contouring shades is essential; darker shades should mimic natural shadows and vary in depth depending on the area being contoured, whereas highlighting shades should reflect light and be bright enough to lift features. Both types of shades can be customized to suit individual skin tones, offering a natural or more dramatic finish based on personal preference.
Step-by-Step Contouring Technique
Step-by-step contouring technique is a popular makeup skill designed to define and enhance the natural features of the face. By carefully applying shading and highlighting products, this method creates a more sculpted and dimensional look. Mastering this technique allows you to achieve a flawless, camera-ready appearance with a subtle or bold finish, perfect for any occasion.
Preparation and Skin Preparation
Step-by-step contouring technique begins with proper preparation and skin preparation to ensure a flawless and long-lasting look. Start by cleansing your face thoroughly to remove any dirt or oils, then apply a lightweight moisturizer suited to your skin type to create a smooth base. Follow with a primer to help the makeup adhere better and stay in place throughout the day. It is essential to choose the right shades of contour and highlight products that complement your skin tone. Before applying contour, ensure your skin is well-hydrated and primed to prevent patchiness or uneven blending. When preparing the skin, consider applying a pore-filling primer if you have oily skin, and a hydrating primer if your skin is dry. This preparation enhances smooth application and helps achieve natural, seamlessly blended contours. Proper skin prep is vital for a sculpted, polished finish while minimizing the appearance of imperfections and creating a perfect canvas for your contouring routine.
Selecting the Right Shades
Step-by-step contouring technique involves systematically sculpting the face to enhance its natural features. Begin by choosing a foundation shade that matches your skin tone for an even base. Then, select a contour shade that is darker than your foundation to create shadows and define areas such as the cheekbones, jawline, and sides of the nose. Apply highlighter to the high points of your face, like the tops of your cheekbones, brow bones, and the bridge of your nose, to bring forward these features. Blend each product seamlessly to avoid harsh lines, using brushes or sponges for a natural finish. The key to successful contouring is selecting the right shades that complement your skin tone, ensuring a harmonious and flattering look. Always test shades in natural light before application for the best match.
Applying Contour
Step-by-step contouring technique is essential for creating a sculpted and defined makeup look. Begin by choosing a contour shade that is a few tones darker than your natural skin tone. Using a contour brush or a makeup sponge, lightly apply the contour product to the areas you want to define, such as the hollows of your cheeks, the sides of your nose, the jawline, and the perimeter of your forehead.
Next, blend the contour product seamlessly into your skin using soft, back-and-forth strokes to avoid harsh lines. Make sure to blend well around the edges to create a natural shadow effect. It’s important to build the product gradually, adding more as needed, rather than applying a heavy layer all at once.
After contouring, apply a highlighter on the high points of your face, such as the tops of your cheekbones, the bridge of your nose, and your cupid’s bow to enhance the sculpted look. Finally, set your makeup with a translucent powder or setting spray to ensure longevity and a polished finish.
Blending Techniques
Contouring makeup enhances your facial features by creating depth and definition. The step-by-step contouring technique begins with selecting the right shades: a contour shade slightly darker than your natural skin tone and a highlighter that is a few shades lighter. Start by applying the contour product to areas where shadows naturally fall, such as beneath the cheekbones, along the jawline, and sides of the nose. Use a brush or beauty sponge to blend the contour into your skin with gentle, sweeping motions, ensuring there are no harsh lines. Next, apply the highlighter to the high points of your face, like the tops of the cheekbones, brow bones, the bridge of the nose, and the cupid’s bow, to bring these areas forward. Blending is crucial; use clean brushes or sponges to seamlessly merge the contour and highlight into your foundation for a natural look.
Blending techniques are essential to achieve a flawless contour. Use soft, feathery strokes to blend the darker contours into your skin, avoiding harsh edges. For a more seamless finish, work in layers, gradually building up the product and blending each layer thoroughly. When blending highlighter, focus on areas where light naturally hits your face, using a light hand to avoid overly shiny spots. The key to successful blending is to make sure there are no visible lines or patches, giving your face dimension without looking cakey. Always use clean tools and take your time to blend thoroughly for a professional-looking, natural contour finish.
Applying Highlight
Step-by-step contouring technique is essential for achieving a sculpted and defined makeup look. Begin by applying a foundation that matches your skin tone to create an even base. Next, choose a contour shade that is slightly darker than your natural skin tone and use a contour brush to gently apply it beneath your cheekbones, along the sides of your nose, the jawline, and the perimeter of your forehead. Blend thoroughly to eliminate harsh lines, ensuring a natural transition. To enhance your features further, apply a highlighter to the high points of your face, such as the tops of your cheekbones, the bridge of your nose, the cupid’s bow, and the inner corners of your eyes. Use a small, fluffy brush to blend the highlighter seamlessly into your skin for a radiant glow. Finish the look by setting your makeup with a translucent powder or setting spray to ensure longevity and a flawless finish.
Final Touch-ups
Step-by-step contouring technique and final touch-ups are essential to achieving a flawless makeup look that enhances your features and adds dimension to your face. Proper contouring can define your cheekbones, slim your nose, and shape your jawline, while finishing touches ensure a seamless and polished appearance.
- Start by selecting the right shades of contour and highlighter that complement your skin tone. Typically, contour shades should be a few shades darker than your foundation, while highlighters should be lighter and luminous.
- Apply a matte contour product to the hollows of your cheeks, the sides of your nose, your jawline, and along your forehead near the hairline. Use a contour brush for precise application and blend well to avoid harsh lines.
- Use a lighter highlighter on the high points of your face, such as the tops of your cheekbones, the bridge of your nose, your brow bones, and your cupid’s bow. Blend these areas seamlessly into your foundation for a natural glow.
- Blend all contour and highlighter shades thoroughly using a clean brush or a damp makeup sponge. This step ensures a smooth transition between shades and a natural finish.
- Check your work in natural light and make any necessary adjustments. Use setting powder or spray to lock in the makeup, ensuring longevity and a matte finish.
- For final touch-ups, define your eyebrows, apply mascara, and add a light blush to add warmth. Enhance your lips and ensure your makeup looks balanced and cohesive.
Contouring for Different Face Shapes
Contouring makeup is a powerful technique that enhances your natural features and creates a more sculpted appearance. However, the most effective contouring styles vary depending on your face shape. Understanding how to tailor contouring techniques to suit different face forms can help you achieve a harmonious and flattering look that highlights your best features. Whether you have a round, oval, square, or heart-shaped face, personalized contouring can make a significant difference in your overall makeup results.
Oval Face
Contouring for an oval face aims to enhance the natural symmetry and balance of features. Since oval faces are considered versatile and well-proportioned, the goal is to subtly define the cheekbones, jawline, and forehead without overdoing it. Lightly contour the sides of the forehead and beneath the cheekbones to add dimension, while keeping the center of the face illuminated. A gentle contour along the jawline can further refine the face shape, making the features stand out beautifully. The key is to apply contour and highlight with a light hand to maintain the natural harmony of an oval face while accentuating its inherent elegance.
Round Face
Contouring for a round face aims to add definition and create the illusion of a more sculpted appearance. To achieve this, focus on contouring the sides of the forehead, under the cheekbones, and the jawline to add dimension. Use a matte bronzer or contour powder that is slightly darker than your skin tone to gently shade these areas. Applying highlighter on the high points of the face, such as the tops of the cheekbones, the bridge of the nose, and the cupid’s bow, will enhance the facial structure. Remember to blend well to avoid harsh lines and to create a natural, lifted look that balances the softness of a round face.
Square Face
Contouring for a square face aims to soften the strong jawline and add dimension to create a balanced appearance. Focus on contouring the sides of the forehead and along the jawline with a matte, darker shade to reduce width and define the structure. Highlight the center of the forehead, the tops of the cheekbones, and the chin to bring forward these areas and create a harmonious look. Avoid harsh, straight lines on the sides of the face; instead, opt for a slightly rounded contour to soften angular features. Blending well is essential to achieve a seamless transition between contour and highlight for a natural finish.
Heart-Shaped Face
Contouring for a heart-shaped face involves balancing the wider forehead and narrower chin, accentuating the cheekbones while softening the jawline. To achieve this, focus on contouring the sides of the forehead and the jawline with darker shades to create dimension. Highlight the tops of the cheekbones and the center of the face to bring attention to the mid-face area. Blending these shades seamlessly ensures a natural and sculpted look that enhances the face’s natural structure.
Long Face
Contouring for a long face aims to create a balanced and harmonious appearance by adding dimension and softening the facial features. The key is to strategically shade areas to shorten the length of the face and enhance certain features for a more proportionate look.
- Apply a slightly darker contour shade along the sides of your forehead, starting from the hairline and blending downward to reduce the appearance of length.
- Contour under the cheekbones, focusing on the hollows to add definition without elongating the face further.
- Slightly contour the jawline to create a more balanced and structured look.
- Use a highlighter on the tops of the cheekbones and the bridge of the nose to bring forward certain features and add dimension.
- Avoid heavy contouring on the center of the face, as this can emphasize length rather than shorten it.
Tips and Tricks for Flawless Contouring
Mastering the art of contouring can dramatically enhance your facial features and create a stunning, sculpted look. Whether you’re a makeup beginner or a seasoned pro, honing tips and tricks for flawless contouring can help you achieve a natural or dramatic effect with ease. With the right techniques and products, you can highlight your best features and create a beautifully balanced face shape that boosts your confidence and style.
Choosing the Right Shades
Achieving a flawless contour look begins with understanding the fundamentals of shade selection and application techniques. Proper contouring can enhance your facial features, create depth, and give your face a more sculpted appearance.
Start by choosing shades that are a few tones darker than your natural skin tone for contouring. For highlighting, opt for shades that are a few tones lighter. This contrast helps in defining features without looking unnatural.
When selecting contour shades, consider your undertone—cool undertones work well with ashier, cooler shades, while warm undertones match better with more golden or bronzier hues. For highlights, choose shades that blend seamlessly into your skin without creating a stark line.
Use a contour brush to apply the darker shades to areas you want to recede, such as the hollows of your cheeks, sides of the nose, and jawline. Lightly blend the edges to avoid harsh lines. For highlighting, apply the lighter shades on the high points of your face like the tops of your cheekbones, the bridge of your nose, and your cupid’s bow.
Remember, less is more when it comes to contouring. Build up the product gradually and blend thoroughly for a natural look. Experimenting with different shades and techniques will help you find what works best for your face shape and skin tone.
Finally, always set your makeup with a translucent powder to ensure longevity and a seamless finish. With practice and the right shades, you can achieve a flawless, sculpted contour that enhances your natural beauty.
Lighting and Environment
Achieving flawless contouring, perfect lighting, and the right environment can elevate your makeup game to the next level. Start by choosing the right contour shades that complement your skin tone for a natural-looking shadow and highlight. Always blend thoroughly to avoid harsh lines, using brushes or sponges for seamless transitions. Proper lighting is crucial; opt for soft, natural light or ring lights that mimic daylight to see your true face shape and color balance. Ensure your environment is clean, clutter-free, and well-lit to maintain focus and precision during application. Additionally, preparing your skin with moisturizer and primer creates a smooth canvas for contouring products, ensuring longevity and a polished finish. Regularly check your makeup from different angles to ensure symmetry and avoid over-contouring. Lastly, setting your makeup with a translucent powder or setting spray helps to lock in your look, making your contour appear flawless throughout the day.
Blending Tips
Achieving flawless contouring and seamless blending can elevate your makeup look, making your features appear more defined and radiant. Mastering these techniques requires patience and practice, but with the right tips, you can create a naturally sculpted appearance that enhances your beauty.
- Start with a clean, moisturized face and apply a primer to create a smooth canvas for contouring products.
- Choose the right contour shade that is a few shades darker than your skin tone for natural shadowing.
- Use a light hand when applying contour to avoid harsh lines; gradually build up the intensity.
- Blend contours thoroughly using a clean, fluffy brush or a damp makeup sponge to eliminate harsh edges.
- Focus contouring on the hollows of your cheeks, sides of your nose, jawline, and around the temples for balanced definition.
- Highlight the high points of your face such as the tops of your cheekbones, bridge of your nose, cupid’s bow, and brow bones to add dimension.
- Use different blending techniques: circular motions for soft edges and sweeping motions for larger areas.
- Set your contoured areas with a translucent powder to improve longevity and prevent smudging.
- Use highlighters with a subtle sheen for a natural glow, avoiding overly glittery products for daytime looks.
Maintaining a Natural Look
Achieving a flawless contour while maintaining a natural look requires technique, subtlety, and the right products. The goal is to enhance your facial features without looking overly made-up, creating a harmonious and fresh appearance.
- Choose a Contour Shade Close to Your Natural Skin Tone: Opt for a contour color that is just a few shades darker than your foundation to create subtle shadows.
- Focus on the Natural Shadows: Identify natural shadow areas, such as under the cheekbones, along the jawline, and the sides of the nose, and accentuate these lightly.
- Blend Thoroughly: Use a clean, fluffy brush or beauty sponge to seamlessly blend the contour products into your skin, avoiding harsh lines.
- Apply Contour in Moderation: Start with a small amount of product and build up gradually, removing excess and blending thoroughly for a natural effect.
- Highlight Strategically: Use a luminous highlighter on the high points of the face, such as the cheekbones, brow bones, and the bridge of the nose, to add dimension without overwhelming the face.
- Set with Translucent Powder: Lightly set your makeup to prevent creasing, but avoid heavy powders that can flatten the natural finish.
- Focus on Symmetry: Keep your contouring balanced on both sides to ensure your face appears naturally sculpted.
- Use the Right Tools: A good contour brush with soft bristles allows for more control and a softer finish.
- Practice and Patience: Perfecting a natural contour takes time, so practice and refine your technique for the best results.
Common Mistakes to Avoid
Contouring makeup can enhance your features and create a stunning look, but it also involves some common pitfalls that can detract from your desired effect. Understanding these mistakes and learning how to avoid them can help you achieve a natural and flawless finish. Whether you’re a beginner or a seasoned makeup enthusiast, being aware of these errors will ensure your contouring skills are always on point.
Unblended Lines
When it comes to contouring makeup, one common mistake to avoid is using unblended lines. Harsh, unblended contours can create a patchy and unnatural appearance, highlighting imperfections rather than enhancing your features. To achieve a seamless look, always blend your contour carefully into your skin using a brush or beauty sponge. Additionally, choosing the right shade that suits your skin tone is crucial; overly dark or light shades can make lines more noticeable. Applying contour in well-lit conditions and gradually building up the product can also help prevent unblended lines. Remember, the key to a flawless contour is patience and thorough blending, ensuring your makeup enhances your natural beauty without harsh lines or patches.
Wrong Shade Selection
One of the most common mistakes in contouring makeup is choosing the wrong shade, which can create an unnatural or harsh appearance. Selecting a contour shade that is too dark can result in an overly dramatic look, while a shade that is too light may not provide enough definition. It’s important to find a contour color that is only a few shades darker than your natural skin tone for a subtle enhancement. Additionally, blending is key—failing to blend your contour properly can leave visible lines and unevenness, undermining the overall effect. Always consider your undertone and lighting conditions when selecting shades, and test in natural light to ensure your contour looks seamless and flattering.
Ignoring Face Shape Considerations
Ignoring face shape considerations is a common mistake in contouring makeup that can lead to an unflattering result. Each face shape requires a tailored approach to highlight the natural features and create harmony. Failing to identify whether you have a round, oval, square, or heart-shaped face can cause contouring that emphasizes undesirable angles or softens key features unintentionally. To achieve a natural and enhancing look, it is essential to customize your contouring techniques according to your face shape. This ensures that shadows and highlights work with your unique structure rather than hiding or distorting it. By paying attention to your face shape, you can avoid common pitfalls and enhance your natural beauty effectively.
Contouring for Different Skin Types and Tones
Contouring makeup is a versatile beauty technique that enhances natural features by adding shadows and highlights to the face. When tailored to different skin types and tones, contouring can create a harmonious and radiant look that accentuates individual beauty. Understanding how to choose the right shades and application methods ensures a flawless finish, whether you have fair, medium, or deep skin tones or different skin textures. Mastering contouring for various skin types allows for personalized makeup that boosts confidence and highlights unique facial contours.
Fair Skin
Contouring for fair skin requires careful selection of shades and techniques to enhance natural features without overpowering the delicate complexion. The goal is to create subtle shadows that define the face while maintaining a natural look. Choosing the right contouring products and colors is essential for achieving a harmonious and radiant finish.
- Use a matte contour shade that is a few shades darker than your natural skin tone. Cool-toned browns work well to mimic natural shadows and avoid an orange or muddy appearance.
- Apply contour to areas where shadows naturally fall, such as beneath the cheekbones, sides of the nose, and along the jawline. Keep the application soft and blend thoroughly to avoid harsh lines.
- Highlight the high points of the face, like the tops of the cheekbones, the bridge of the nose, and the cupid’s bow, with a light, luminous highlighter to bring dimension and brightness.
- For a more sculpted look, you can also contour the sides of the forehead and under the chin, but always blend seamlessly to maintain a natural appearance.
- Remember that less is often more with fair skin tones. Build the contour gradually to achieve a subtle, natural enhancement rather than a dramatic change.
Medium Skin
Contouring for medium skin tones involves selecting shades that enhance your natural warmth and dimension without creating a harsh contrast. For medium skin, warm-toned contours such as caramel, bronze, or almond hues work beautifully to add depth and definition to your face. It’s important to choose contour shades that are just a few shades darker than your skin tone to ensure a natural-looking finish. When applying, focus on areas like the hollows of the cheeks, sides of the nose, jawline, and around the perimeter of the forehead to sculpt and define your features effectively. Blending is key to achieving a seamless transition between contour and foundation, ensuring your face looks naturally contoured and radiant.
Dark Skin
Contouring for dark skin tones requires selecting the right shades and techniques to enhance natural features without looking harsh. For deep skin tones, choose contour shades that are a few shades darker than your natural complexion, such as warm browns and chocolate hues, to create depth and dimension. Incorporate matte products for a natural finish and avoid overly ashy or grey-toned shades that can create a dull effect. When contouring, focus on key areas like the hollows of the cheeks, sides of the nose, jawline, and temples to sculpt the face beautifully. Blending is essential to achieve a seamless, flattering look, ensuring the contour transitions smoothly into the skin. Highlighting should complement the contour shades, using subtly luminous highlighters on the high points of the face to add brightness and lift. Overall, adapting contouring techniques to dark skin tones enhances natural beauty and creates a stunning, dimensional appearance.
Oily and Dry Skin Considerations
Contouring makeup techniques vary significantly based on skin types and tones, requiring tailored approaches to enhance natural beauty while maintaining skin health. Understanding the specific needs of oily and dry skin is essential for achieving a flawless contour that looks seamless and lasts throughout the day.
For different skin tones, choosing the right shades is crucial. Lighter skin tones typically benefit from subtle, cool-toned contour shades like taupe or soft browns to create dimension without stark contrast. Deeper skin tones look stunning with warmer, richer contour shades such as deep browns and bronze tones that complement their natural hue.
When contouring oily skin, opt for matte, oil-free, and long-lasting formulas that help control shine and reduce excess oil production. Powder contours are often preferable as they absorb excess oil, but oil-free cream formulas can work for a more dewy finish if set properly. Blending well and setting with translucent powder helps maintain a matte look.
For dry skin, cream or stick contours provide hydration and blend easily, creating a more natural and dewy finish. Avoid powders that can accentuate flakiness or dry patches. Hydrating primers and moisturizers before contouring can enhance blending and prevent the makeup from settling into dry areas.
- Identify your skin tone and undertone to select suitable contour shades.
- Choose formula types based on skin type: powders for oily skin, creams for dry skin.
- Apply contour in natural light to ensure subtle enhancement rather than harsh lines.
- Set oily skin contours with translucent powder to reduce shine.
- Use hydrating products and cream contours for dry skin to maintain a luminous finish.
- Blend thoroughly to achieve seamless, natural-looking definition.
Trends and Modern Approaches to Contouring
Contouring makeup has evolved significantly over the years, with trends and modern approaches shaping the way enthusiasts enhance their features. Today, contouring techniques combine artistry and innovation, allowing for more natural and customized looks. From harnessing new products to embracing digital influences, contemporary contouring continues to inspire creativity and self-expression among beauty enthusiasts worldwide.
Nontouring and Soft Contouring
Contouring makeup has evolved significantly over recent years, incorporating diverse trends and modern approaches to enhance facial features subtly and naturally. Contemporary contouring emphasizes a more refined, blended look, moving away from harsh lines to achieve a seamless transition between shadows and highlights. Soft contouring, in particular, has gained popularity for its ability to create a dimension without overpowering the natural facial structure, making it suitable for everyday wear. Nontouring and minimal contouring techniques focus on enhancing natural bone structure with minimal product, providing a fresh and effortless appearance. Modern methods often utilize cream or stick formulas for easier blending, along with strategic placement to accentuate specific areas like cheekbones, jawline, and nose. Additionally, the use of contouring palettes with multiple shades has become a trend, allowing for customizable and professional-looking finishes. Overall, the current approach to contouring emphasizes enhancing natural beauty through subtlety, skillful blending, and innovative product formulations.
Glow and Strobing Techniques
Contouring makeup has evolved significantly with recent trends emphasizing a natural and radiant look. Modern approaches focus on enhancing facial features subtly rather than creating dramatic shadows, blending techniques seamlessly into everyday wear. Glow and strobing have gained popularity as alternative methods to achieve a luminous complexion, emphasizing high points of the face with minimal product for a dewy finish. Innovative formulas such as cream, liquid, and powder highlighters are now combined with innovative tools like damp beauty sponges and fan brushes to ensure effortless blending. Additionally, the use of lightweight, buildable products allows for customizable intensity, catering to both subtle day looks and more pronounced evening styles. Embracing skincare prep as part of contouring routines ensures a healthy, glowing base, making contemporary methods more about enhancing natural beauty than masking it. Overall, trends lean toward a fresh, luminous appearance achieved through thoughtful techniques that emphasize balance and harmony rather than stark contrast.
Contouring with Accessories and Innovative Tools
Contouring makeup has evolved significantly with trends and modern techniques, allowing for more precise and creative expressions of facial architecture. Currently, the focus is on natural-looking contouring that enhances one’s features without appearing heavy, utilizing lightweight formulas and blending tools to achieve seamless results. Innovations in technology and product formulations have made contouring more accessible and customizable for different skin tones and types.
Contouring with accessories, such as brushes, sponges, and stencils, has become a popular way to streamline the process and improve accuracy. Precision brushes with various shapes help define cheekbones, jawlines, and noses, while blending sponges ensure a flawless finish. Stencils and adhesive guides assist in creating sharp lines and symmetry, making contouring less daunting for beginners.
Modern approaches also include the use of innovative tools like 3D contour pens, automatic contour sticks, and app-based tutorials that offer personalized recommendations. These tools not only facilitate better control and application but also inspire more experimental and creative looks. As the makeup industry continually advances, contouring remains a versatile art form that adapts to individual styles and technological innovations, empowering users to achieve professional results at home.